Accurately measuring ingredients is essential in cooking and baking for consistent results. Dry and liquid components require different tools and techniques for precise measurement.
Achieving perfection in the kitchen is a blend of art and science, where even small discrepancies in ingredient quantities can impact your culinary creations. Whether you’re a seasoned chef or a home cooking enthusiast, understanding the proper methods to measure dry and liquid ingredients is crucial.
Recipes hinge on precision, which is why equipping yourself with a set of measuring cups and spoons, along with a kitchen scale, is a wise investment. Having conversion charts at your disposal can streamline the process, especially during those moments when a quick swap between metric and imperial units is necessary. Getting the quantities right not only affects the taste and texture of your dishes but also ensures nutritional accuracy, which is particularly important for those following specific dietary guidelines. Let’s dive into the nitty-gritty of how to measure ingredients with confidence.

Introduction To Measuring Ingredients
Welcome to the art of measuring ingredients – a skill crucial for success in the kitchen. Whether you’re an aspiring chef or a home cook, precision can transform your cooking and baking. This introduction aims to guide you through the essentials of measuring different types of ingredients. Let’s embark on this culinary journey towards perfect measurements every time.
The Importance Of Precision In Cooking And Baking
Precision is the cornerstone of great recipes. Incorrect measurements can lead to several issues. It might turn your fluffy cakes into hockey pucks. Your dishes could taste too salty or overly sweet. Precision ensures consistent results, making your cooking reliable and delicious.
Understanding The Different Measurement Systems
Different regions use various systems for measuring ingredients. The United States primarily uses the customary system with cups, teaspoons, and tablespoons. Most of the world uses the metric system, which includes grams and liters. Understanding these systems is vital for following recipes globally.
Common Measurement Challenges In The Kitchen
There are hurdles every cook faces when measuring ingredients. Ensuring accuracy with dry and liquid ingredients requires different techniques. Spoons and cups must be level for dry ingredients. Liquids need a steady hand to read at eye level. Let’s uncover solutions and tools to help nail those measurements.
Conversion charts are incredibly helpful tools. They turn tedious calculations into a swift, hassle-free process. Keep one handy in your kitchen for quick reference. With these tips, your kitchen moments will be more enjoyable and your dishes more successful.
Measuring Dry Ingredients
Getting the right amount of dry ingredients can make or break a recipe. Whether baking a cake or cooking a casserole, accuracy is key. This section dives into how to measure dry ingredients the right way.
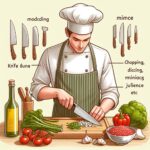
Tools And Techniques: Choosing The Right Utensils
Success starts with the right tools. Here’s what every home chef needs:
- Measuring cups – For scooping and leveling dry ingredients.
- Measuring spoons – For smaller quantities.
- Scale – For precision, especially in baking.
Step-by-step Guide To Measuring Dry Ingredients
Measure like a pro with these simple steps:
- Fluff up the ingredient with a utensil.
- Spoon it into the measuring cup.
- Level it off with a flat edge without compacting it.
This method ensures that measurements are consistent every time.
Addressing Compaction And Aeration Issues
Different ingredients behave differently. Flour can pack down, while cocoa powder might aerate. To avoid this:
- Never scoop directly from the container.
- Don’t tap the measuring cup; it settles the ingredients.
- For brown sugar, packing might be necessary.
Each ingredient has its quirks, but the right technique brings you closer to perfection.
Measuring Liquid Ingredients
When baking or cooking, precise measurements spell the difference between success and guesswork. Measuring liquids right is key to consistency. Let’s unlock the secrets to liquid measurements.
The Role Of Liquid Measuring Cups
Liquid measuring cups are designed for accuracy. They ensure the right amount of liquid. Here’s why they matter:
- Clear markings: They show exact measures.
- Spouts: They help pour without spills.
- Sturdy handles: They provide a good grip.
Tips For Ensuring Accurate Liquid Measurements
To measure liquids correctly:
- Flat surface: Start by placing your cup on a level surface.
- Eyes level: Bend down to check at eye level.
- Steady pour: Pour slowly to avoid overfilling.
Dealing With Surface Tension And Meniscus
The meniscus can trick your eyes. This is how to read it right:
- Spot the meniscus. It’s the curve you see at the liquid’s top.
- Aim for the bottom of the meniscus. It sits at the true measure line.
Remember these pointers and you’ll master liquid measurements, enhancing your kitchen adventures.
Understanding Conversion Charts
Precision is crucial in the art of cooking and baking. Using conversion charts ensures the accuracy of ingredient measurements. Without them, recreating that perfect dish consistently may not be possible. Conversion charts provide a quick reference to translate different units of measurement. They help to maintain the integrity of a recipe, especially when dealing with limited measuring tools or international recipes.
When And How To Use Conversion Charts
Bakers and chefs often find themselves in a position where they need to convert measurements. It’s usually when:
- Scaling recipes up or down
- Substituting ingredients
- Using tools from other countries
To use a conversion chart effectively, follow these steps:
- Find the unit you have
- Look across to the unit you need
- Apply the conversion factor
Converting Between Metric And Imperial Measurements
The world uses two main systems: metric and imperial. To make recipes work regardless of the system, understanding these conversions is key.
| Metric | Imperial |
|---|---|
| 1 gram | 0.035 ounces |
| 1 litre | 0.264 gallons |
| 1 centimetre | 0.394 inches |
Adjusting Recipes With Conversion Charts
Sometimes, a recipe might call for a measurement not readily available. Here’s when a conversion chart becomes your best friend. For instance, to substitute 1 cup of sugar for honey, a conversion chart will provide the accurate amount needed for the consistency and sweetness to remain intact.
Use conversion charts smartly:
- Always check for ingredient-specific conversions
- Remember that some conversions may affect texture and taste
- Adjust cooking times as liquid ratios change

Advanced Measuring Techniques
Striving for the perfect bake or the most flavorful dish often boils down to precision. Advanced measuring techniques ensure results are consistent and professional every time. Let’s dive into the specific methods that can transform any kitchen experience.
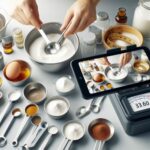
The Use Of Kitchen Scales For Precise Measurements
Measuring by weight with a kitchen scale is a game-changer. It is crucial for baking, where precision is paramount. Whether it’s flour, sugar, or butter, scale usage eliminates guesswork. For exact measurements:
- Zero the scale with your container on it.
- Add the ingredient until the desired weight is reached.
- Remember, 1 cup of flour should weigh about 120 grams.
Volume Vs. Weight: Which Is More Accurate?
Volume measuring involves cups and spoons. Weight measuring uses scales. The latter is more exact. A cup of flour can vary in weight, but 120 grams is always 120 grams. For liquids, volume is typically used. Yet, professional kitchens still prefer weight for utmost accuracy.
Measuring Sticky Ingredients Without The Hassle
Sticky ingredients like honey or syrup can be tough to measure. But, there’s a simple trick. Coat your measuring tool with oil, and watch these ingredients slide right off. This method ensures you get every bit into your mix without the sticky mess.
| Ingredient | Tips for Success |
|---|---|
| Honey, Syrup, Molasses | Oil the cup, measure, and pour with ease. |
| Peanut Butter, Jams | Oil-based spray works wonders for a clean release. |
Common Mistakes And How To Avoid Them
Getting measurements right is crucial in cooking and baking. Small mistakes can lead to big problems. Mastering the art of accurate ingredient measurement ensures delicious results. Watch out for common pitfalls and learn how to sidestep them.
Misreading Measurements: Cups vs. Ounces
Misreading Measurements: Cups Vs. Ounces
Cups and ounces are not always interchangeable. Cups measure volume. Ounces can indicate weight or volume. Liquid ounces measure volume. Dry ounces measure weight. This confusion can derail your recipe.
- Read recipes carefully. Look for clues on whether it’s volume or weight.
- Use liquid measuring cups for liquids. Use dry measuring cups for dry ingredients.
- For accuracy, place your measuring cup on a flat surface. Pour or scoop your ingredient in. Level off with a straight edge for dry goods.
Inaccurate Measuring Tools: The Calibration Factor
Measuring tools can become uncalibrated. This means they no longer measure correctly. Faulty tools give wrong measures. This can spoil your dish.
Check your scales and cups regularly. Ensure they start at zero. Calibrate when needed. Use quality tools. They stay accurate longer.
The Pitfalls Of Interchanging Ingredients
Substituting ingredients can be tricky. Each ingredient behaves differently. For example, using powdered sugar for granulated sugar impacts texture and sweetness.
To substitute wisely, use a conversion chart. It guides you in maintaining balance in your dish. Remember, some ingredients cannot be interchanged at all.
| Ingredient | Substitution Guide |
|---|---|
| 1 cup granulated sugar | 1 cup powdered sugar |
| 1 tablespoon wheat flour | 1 tablespoon almond flour |
Tips For Successful Recipe Adaptation
Accurate measurement is key to perfecting recipes. Adapting a recipe requires changing amounts and sometimes conversions. It’s not just about scalability; it involves understanding the science of cooking. Let’s explore some essential tips for adapting recipes successfully, ensuring every dish you make is as delicious as intended.
Adjusting Ingredient Ratios For Different Serving Sizes
When cooking for more or fewer people, adjusting ingredient ratios is crucial. You can’t simply double or halve a recipe and expect it to yield the same results. Below is a guide to help you scale recipes effectively:
- Consult a conversion chart: Always use this for accuracy when altering recipes.
- Rework spices cautiously: Spices can overwhelm; increase them with care.
- Adjust cooking times: More ingredients may need longer; fewer, shorter.
| Original Quantity | Double | Half |
|---|---|---|
| 1 cup | 2 cups | 1/2 cup |
| 1 tablespoon | 2 tablespoons | 1 1/2 teaspoons |
| 1 teaspoon | 2 teaspoons | 1/2 teaspoon |
Understanding The Role Of Altitude In Measurement Adjustments
Altitude affects baking significantly because the air pressure changes. This impacts moisture, evaporation, and temperature. Here’s what you need to do:
- Reduce baking powder: Decrease it by ⅛ teaspoon for every 3,500 ft above sea level.
- Increase liquid: For each cup, add 1 to 2 tablespoons at high altitudes.
- Higher baking temperature: Raise it slightly to counteract lower air pressure.
Adapting International Recipes With Different Measurement Standards
Global recipes often use grams or milliliters. Use a conversion chart. Here are steps for precision:
- Use a digital scale for weight. It’s more exact than cups.
- Check ingredient specifics: Some have unique conversion rates.
- Convert temperatures between Celsius and Fahrenheit accurately.
| Cups | Grams |
|---|---|
| 1 | 240 |
| 1/2 | 120 |
| 1/4 | 60 |

Conclusion
Mastering the precision in measuring ingredients is essential for cooking success. Embrace the use of conversion charts for flawless dry and liquid measurements. Your culinary creations will thank you for it. Remember, accuracy is not just about taste—it’s about consistency and perfection in every dish.
Happy cooking!
Frequently Asked Questions On Measuring Ingredients Accurately: Dry, Liquid, Conversion Charts
How Do You Convert Dry Measurements To Liquid?
To convert dry measurements to liquid, use a conversion chart. One cup of liquid equals eight fluid ounces, but dry ingredients vary by weight, so check specific ingredient conversions.
How Do You Measure Dry And Liquid Ingredients Accurately?
To measure dry ingredients, use a flat-edged utensil for leveling after filling a measuring cup to the brim. For liquids, pour into a transparent measuring cup with a spout, and view at eye level to ensure an accurate measure.
Is 1 Cup Dry The Same As 1 Cup Liquid?
1 cup dry and 1 cup liquid measure volume, not weight, making them equivalent in size but potentially different in weight due to varying densities of substances.
Is 8 Oz Dry The Same As 8 Oz Liquid?
No, 8 oz dry measure is not the same as 8 oz liquid measure. Dry ounces measure weight, while fluid ounces measure volume.